
In this comprehensive tutorial, we’ll take you through the step-by-step process of building a GUI. We’ll cover essential concepts, tools, and practical examples to help you understand and create intuitive interfaces.
Installing OpenCV and PyQt5
The objective is to create a webcam user interface using two core libraries: OpenCV for handling acquisition and PyQt5 for the interface design.
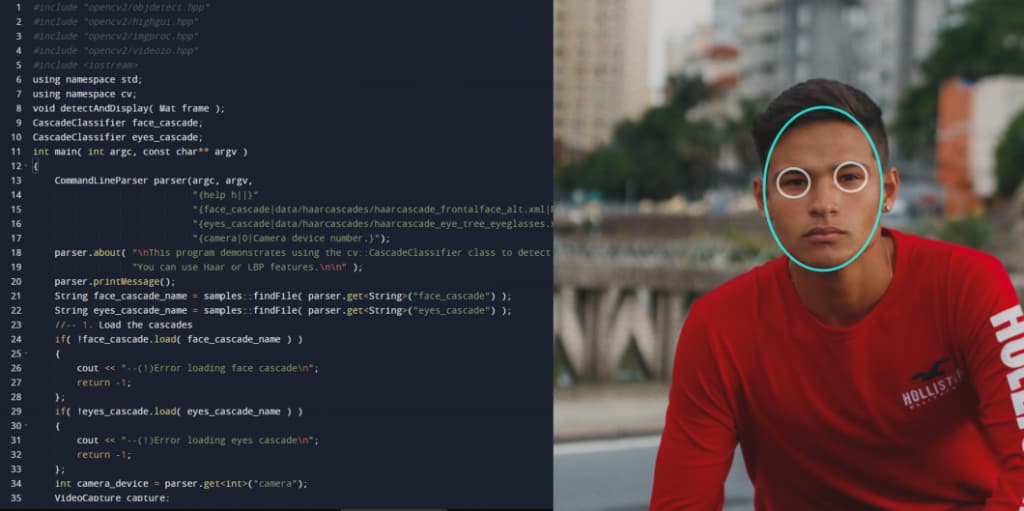
OpenCV is a robust package compatible with various programming languages. It excels in image manipulations, such as face-detection, object tracking, among others. While this tutorial won’t explore all its capabilities, it’s crucial to recognize its extensive potential. To install OpenCV, execute the command:
bash

pip install opencv-contrib-python
Remember to work within a virtual environment for cleaner library management and to prevent conflicts. The installation process should automatically include numpy. In case of installation issues, seek assistance in the forum or refer to the official documentation.
To verify the successful installation and configuration of OpenCV, access the Python interpreter and execute the following commands to check the available version:
Installing OpenCV and PyQt5 can be done in a few ways, depending on your operating system and preferred method. Here are the three most common approaches:
1. Using a Package Manager
This is the simplest and most recommended method, especially for beginners. Package managers like pip (for Windows and Linux) and conda (for all operating systems) handle all the dependencies and ensure compatibility.
On Windows and Linux:
- Open a terminal window.
- For pip:
pip install opencv-python
pip install PyQt5
- For conda:
conda install opencv
conda install pyqt
On macOS:
- Use Homebrew, a popular package manager for Mac;
- Open a terminal window;
- Install OpenCV and PyQt5:
brew install opencv
brew install pyqt
2. Using a Virtual Environment
This method is recommended if you want to isolate your OpenCV and PyQt5 installation from other Python environments.
- Create a virtual environment using your preferred method (e.g., python -m venv my_env);
- Activate the virtual environment (e.g., source my_env/bin/activate);
- Install OpenCV and PyQt5 using the same commands as mentioned above (pip or conda).
3. Manual Installation:
This method is more complex and requires downloading the libraries and installing them manually. It’s only recommended if you have specific requirements or encounter issues with the other methods.
- Download the appropriate wheel files for OpenCV and PyQt5 from their respective websites:
- Open a terminal window and navigate to the directory containing the downloaded wheels;
- Install the libraries using the pip install command:
pip install opencv-python-<version>-cp310-cp310-win_amd64.whl (replace with your downloaded file)
pip install PyQt5-<version>-cp310-cp310-win_amd64.whl (replace with your downloaded file)
Note:
- Make sure to replace <version> with the actual version you downloaded;
- The specific wheel file names will vary depending on your operating system and Python version.
Additional Tips:
- PyQt5 requires additional Qt dependencies. These are usually installed automatically by pip or conda, but you may need to install them manually if you encounter issues;
- You can verify your OpenCV and PyQt5 installation by running python and importing the libraries:
Python
import cv2
import PyQt5
print("OpenCV:", cv2.__version__)
print("PyQt5:", PyQt5.__version__)
If you encounter any errors during the installation process, consult the documentation for OpenCV and PyQt5 or search online for help.
Welcome to OpenCV
It’s great to dive into OpenCV! What specifically are you looking to explore or achieve with OpenCV? Whether it’s image processing, computer vision tasks, or something else, there’s a lot this powerful library can do.
Understanding what you want to achieve before diving into the UI development is crucial. OpenCV simplifies webcam access:
python
import cv2 import numpy as np cap = cv2.VideoCapture(0) ret, frame = cap.read() cap.release() print(np.min(frame)) print(np.max(frame))This code initiates camera communication, reads a frame (if a camera’s connected), and prints its minimum and maximum pixel values. Remember, ‘frame’ is a NumPy 2D-array.
To capture video continuously from the camera:
python
import cv2 cap = cv2.VideoCapture(0) while True: ret, frame = cap.read() gray = cv2.cvtColor(frame, cv2.COLOR_BGR2GRAY) cv2.imshow('frame', gray) if cv2.waitKey(1) & 0xFF == ord('q'): break cap.release() cv2.destroyAllWindows()Here, it reads frames in a loop, displays them, and exits when ‘q’ is pressed. Modifying camera settings, like brightness, is possible using cap.set(cv2.CAP_PROP_BRIGHTNESS, 1). Not all options might work due to camera limitations.
Continuous acquisition in a loop can be problematic if frame acquisition takes time, especially with longer exposure settings.
Welcome to PyQt
PyQt is an amazing toolkit for creating graphical user interfaces in Python. What specifically are you looking to explore or achieve with PyQt? Creating custom widgets, designing sleek interfaces, or integrating functionality into your application—there’s a lot you can do with PyQt!
Much like OpenCV, Qt is a versatile C++ library available across multiple platforms. PyQt serves as Python bindings to Qt, allowing access to Qt’s functionality within Python. Learning PyQt involves navigating documentation primarily written for the original C++ code, which requires translating concepts between languages. While this learning curve exists, once mastered, PyQt proves effective.
Note: There’s an alternate set of Python bindings called PySide2. Functionally identical to PyQt, they differ in licensing, offering options for code release considerations.
A user interface operates within an infinite loop, handling window drawing, user interactions, webcam image display, etc. Exiting this loop ends the application, closing associated windows. Let’s start with a basic window:
python
from PyQt5.QtWidgets import QApplication, QMainWindow app = QApplication([]) win = QMainWindow() win.show() app.exit(app.exec_())app.exec_() creates the loop. Omitting this line results in the program running without any visible effect. Placing it within app.exit() ensures proper application closure when the loop ends. Always define the application before any windows to avoid errors.
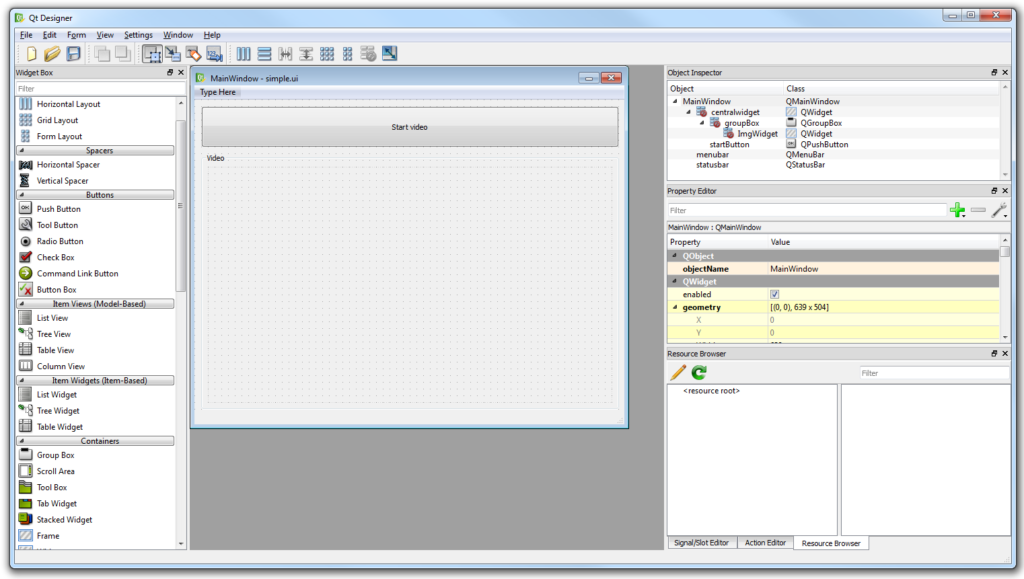
In PyQt, windows are Widgets—buttons, dialogs, images, icons, etc. You can even craft custom widgets. To enhance our simple window, let’s add a button:
python
from PyQt5.QtWidgets import QApplication, QMainWindow, QPushButton app = QApplication([]) win = QMainWindow() button = QPushButton('Test') win.setCentralWidget(button) win.show() app.exit(app.exec_())Here, QPushButton creates a button with defined text. Setting the button as the central widget within QMainWindow enables its display. It might look trivial, but it’s a solid starting point.
The next step involves defining actions triggered by button presses, requiring an understanding of Signals and Slots within Qt’s context.”
Signals and Slots in Qt
Developing complex applications, especially those with a UI, often involves triggering different actions based on specific conditions or events. Imagine scenarios like sending an email when webcam recording completes or saving the video to disk or publishing it on YouTube. Flexibility in triggering actions upon certain events simplifies code maintenance and updates.
In Qt, this functionality is managed through Signals and Slots. Signals represent specific events, while Slots are the corresponding actions executed in response. For instance, associating a function with a button press in PyQt:
python
from PyQt5.QtWidgets import QApplication, QMainWindow, QPushButton def button_pressed(): print('Button Pressed') app = QApplication([]) win = QMainWindow() button = QPushButton('Test') button.clicked.connect(button_pressed) win.setCentralWidget(button) win.show() app.exit(app.exec_())Here, button.clicked.connect(button_pressed) connects the button’s click signal to the button_pressed function. Pressing the button triggers the function.
You can connect multiple functions to the same signal, allowing for diverse actions. For instance:
python
def new_button_pressed(): print('Another function') button.clicked.connect(button_pressed) button.clicked.connect(new_button_pressed)Pressing the button now triggers both button_pressed and new_button_pressed functions.
Adding multiple widgets to a MainWindow involves setting up a central widget to hold them:
python
from PyQt5.QtWidgets import QApplication, QMainWindow, QPushButton, QVBoxLayout, QWidget app = QApplication([]) win = QMainWindow() central_widget = QWidget() button = QPushButton('Test', central_widget) button2 = QPushButton('Second Test', central_widget) win.setCentralWidget(central_widget) win.show() app.exit(app.exec_())By defining a QWidget as the central widget, you can position and display multiple buttons within it.
Controlling button placement involves using setGeometry to define positions relative to the parent widget:
python
button.setGeometry(0, 50, 120, 40)Adjusting these parameters moves and resizes buttons within the widget.
Connecting functions to these buttons remains consistent:
python
button.clicked.connect(button_pressed) button2.clicked.connect(button_pressed)This pattern simplifies code maintenance but might be challenging for beginners due to its distributed nature across the program. Understanding which action triggers upon which event might require some time to grasp.
Adding Layouts for Styling
In PyQt, layouts play a pivotal role in organizing and styling user interfaces. They manage the positioning and resizing of widgets within windows or other containers, allowing for responsive designs. Here’s a guide on incorporating layouts for better styling:
Using Layouts for Button Placement:
python
from PyQt5.QtWidgets import QApplication, QMainWindow, QPushButton, QVBoxLayout, QWidget def button_pressed(): print('Button Pressed') app = QApplication([]) win = QMainWindow() central_widget = QWidget() # Creating buttons button = QPushButton('Test') button2 = QPushButton('Second Test') # Creating a vertical layout to hold buttons layout = QVBoxLayout() layout.addWidget(button) layout.addWidget(button2) # Setting the layout for the central widget central_widget.setLayout(layout) win.setCentralWidget(central_widget) win.show() app.exit(app.exec_())In this example, the QVBoxLayout allows stacking buttons vertically within the widget. This layout is then applied to the central_widget.
Employing Horizontal Layouts:
python
from PyQt5.QtWidgets import QApplication, QMainWindow, QPushButton, QHBoxLayout, QWidget def button_pressed(): print('Button Pressed') app = QApplication([]) win = QMainWindow() central_widget = QWidget() # Creating buttons button = QPushButton('Test') button2 = QPushButton('Second Test') # Creating a horizontal layout to place buttons side by side layout = QHBoxLayout() layout.addWidget(button) layout.addWidget(button2) # Setting the layout for the central widget central_widget.setLayout(layout) win.setCentralWidget(central_widget) win.show() app.exit(app.exec_())In this instance, QHBoxLayout arranges buttons horizontally within the widget.
Nested Layouts for Advanced Designs:
python
from PyQt5.QtWidgets import QApplication, QMainWindow, QPushButton, QHBoxLayout, QVBoxLayout, QWidget def button_pressed(): print('Button Pressed') app = QApplication([]) win = QMainWindow() central_widget = QWidget() # Creating buttons button = QPushButton('Test') button2 = QPushButton('Second Test') # Creating layouts for buttons and nested layout button_layout = QHBoxLayout() button_layout.addWidget(button) button_layout.addWidget(button2) # Creating a vertical layout to hold the nested layout and additional widgets main_layout = QVBoxLayout() main_layout.addLayout(button_layout) # Add more widgets or nested layouts here if needed central_widget.setLayout(main_layout) win.setCentralWidget(central_widget) win.show() app.exit(app.exec_())This code showcases nesting layouts. Here, a horizontal layout button_layout is nested within a vertical layout main_layout, offering flexibility for more complex UI arrangements.
Understanding Layouts:
- QVBoxLayout arranges widgets vertically;
- QHBoxLayout arranges widgets horizontally;
- setLayout() assigns the layout to a widget;
- Nested layouts allow for sophisticated UI designs.
These layout managers assist in creating visually appealing and organized interfaces, enabling better control and consistency in UI designs.
Acquiring An Image from the GUI
To acquire an image from the webcam through the GUI, you’ll need to integrate OpenCV’s functionality into the PyQt interface. Here’s an example of how you might achieve this:
python
import cv2 import numpy as np from PyQt5.QtWidgets import QApplication, QMainWindow, QPushButton, QVBoxLayout, QLabel, QWidget from PyQt5.QtGui import QPixmap, QImage from PyQt5.QtCore import QTimer class WebcamApp(QMainWindow): def __init__(self): super().__init__() self.setWindowTitle("Webcam Viewer") self.central_widget = QWidget() self.setCentralWidget(self.central_widget) self.layout = QVBoxLayout() self.central_widget.setLayout(self.layout) self.label = QLabel() self.layout.addWidget(self.label) self.capture_button = QPushButton("Capture Image") self.capture_button.clicked.connect(self.capture_image) self.layout.addWidget(self.capture_button) self.cap = cv2.VideoCapture(0) self.timer = QTimer(self) self.timer.timeout.connect(self.update_frame) self.timer.start(30) def update_frame(self): ret, frame = self.cap.read() if ret: frame = cv2.cvtColor(frame, cv2.COLOR_BGR2RGB) image = QImage(frame, frame.shape[1], frame.shape[0], QImage.Format_RGB888) pixmap = QPixmap.fromImage(image) self.label.setPixmap(pixmap) def capture_image(self): ret, frame = self.cap.read() if ret: cv2.imwrite("captured_image.jpg", frame) print("Image captured and saved as captured_image.jpg") if __name__ == "__main__": app = QApplication([]) window = WebcamApp() window.show() app.exit(app.exec_())This PyQt-based code initializes a simple GUI with a QLabel to display the webcam feed and a QPushButton to capture an image from the webcam. It continuously updates the QLabel with frames from the webcam using OpenCV and displays them in the interface.
When the “Capture Image” button is clicked, it captures a single frame from the webcam and saves it as “captured_image.jpg” in the current directory. You can modify this functionality according to your specific needs, such as displaying the captured image within the interface or performing further processing.
Example code:
python
import cv2 import numpy as np from PyQt5.QtWidgets import QApplication, QMainWindow, QPushButton, QVBoxLayout, QWidget cap = cv2.VideoCapture(0) def button_min_pressed(): ret, frame = cap.read() if ret: print("Minimum pixel value in the frame:", np.min(frame)) def button_max_pressed(): ret, frame = cap.read() if ret: print("Maximum pixel value in the frame:", np.max(frame))This code snippet imports necessary libraries, initializes a video capture object, and defines two functions, button_min_pressed and button_max_pressed. These functions are intended to read frames from the webcam (cap.read()) and display the minimum and maximum pixel values in each frame using NumPy’s np.min() and np.max() functions, respectively. Additionally, it includes a check (if ret:) to ensure that the frame is successfully captured before processing it.
Layout of the Program: MVC design pattern
To enhance our code’s clarity and maintainability, we’ll organize it into separate modules and classes, following the Model-View-Controller (MVC) pattern. In the realm of desktop applications interfacing with devices like cameras, the MVC roles take on different meanings:
- Controller: In our context, the controller represents the driver facilitating communication with the device, such as the camera. OpenCV provides this driver, but we might eventually develop our custom drivers;
- Model. Here, the model encompasses the logic governing how we utilize the device, not solely adhering to its original design. For instance, even if the camera supports only single-frame capture, our model could implement a “movie” method for continuous acquisition, incorporating necessary checks;
- View. The view pertains to the user interface, encapsulating all elements related to Qt. Best practice dictates separating logic from the view. The model should handle scenarios like preventing execution if the webcam isn’t ready, keeping the view focused solely on presentation.
While MVC is prevalent in many applications, interpreting these components—especially when building applications from scratch—is crucial. Unlike web frameworks like Django or Flask that impose specific patterns, desktop and scientific application frameworks often lack such predefined structures, requiring a more grassroots approach.
The Camera Model
To establish a structured approach to managing our camera functionalities, we’ll craft a model class within a file named models.py. This model serves as an intermediary between our program and the camera, enabling smooth integration and potential future modifications.
Initially, let’s draft a skeletal structure outlining the methods and their roles:
python
class Camera: def __init__(self, cam_num): pass def get_frame(self): pass def acquire_movie(self, num_frames): pass def set_brightness(self, value): pass def __str__(self): return 'Camera'This basic model outlines key methods for camera interaction: initializing the camera, capturing frames, acquiring a movie, adjusting brightness, and a method for string representation.
Let’s add depth to these methods. Starting with the initialization and string representation:
python
def __init__(self, cam_num): self.cam_num = cam_num self.cap = None def initialize(self): self.cap = cv2.VideoCapture(self.cam_num) def __str__(self): return f'OpenCV Camera {self.cam_num}'By initializing the camera within the initialize method, we allow flexibility in opening or closing the camera as needed.
Additionally, let’s implement methods to manage the camera’s lifecycle:
python
def close_camera(self): self.cap.release() def get_frame(self): ret, self.last_frame = self.cap.read() return self.last_frame def acquire_movie(self, num_frames): movie = [] for _ in range(num_frames): movie.append(self.get_frame()) return movie def set_brightness(self, value): self.cap.set(cv2.CAP_PROP_BRIGHTNESS, value) def get_brightness(self): return self.cap.get(cv2.CAP_PROP_BRIGHTNESS)These methods encapsulate crucial camera operations such as acquiring frames, capturing movies, adjusting brightness, and retrieving brightness levels.
To test the model, an example at the end of models.py can be included:
python
if __name__ == '__main__': cam = Camera(0) cam.initialize() print(cam) frame = cam.get_frame() print(frame) cam.close_camera()This code snippet initializes the camera, captures a frame, displays the camera representation, and then closes the camera, offering a glimpse into its functionality.
The model serves as a crucial foundation for our user interface development, offering a systematic way to interact with the camera.
Reusable Qt Windows: Subclassing
To create reusable windows in Qt, we employ subclassing – extending the functionalities of existing window classes to build customized, self-contained windows for distinct purposes.
Begin by defining a base window, inheriting from QMainWindow or another relevant Qt window class. Let’s assume we’re crafting a basic window named BaseWindow:
python
from PyQt5.QtWidgets import QMainWindow class BaseWindow(QMainWindow): def __init__(self): super().__init__() # Additional setup for the base windowWith this base window structure, you can then create specialized windows by subclassing BaseWindow. For instance, let’s create a window specifically designed for camera interaction, named CameraWindow:
python
class CameraWindow(BaseWindow): def __init__(self): super().__init__() # Further setup specific to the camera windowThis CameraWindow inherits all features from BaseWindow while enabling specific modifications or additions tailored for camera-related functionalities.
Subclassing facilitates modularization and reusability. For instance, you might create another window, SettingsWindow, inheriting from BaseWindow to handle application settings:
python
class SettingsWindow(BaseWindow): def __init__(self): super().__init__() # Custom settings window setupBy structuring windows through subclassing, you establish a robust system where each window can encapsulate its unique functionalities while leveraging the shared capabilities defined in the base window.
This approach streamlines window creation, ensuring consistency across your application and simplifying maintenance and updates.
Displaying an Image on the GUI
Certainly! Displaying an image on a PyQt GUI involves integrating OpenCV with Qt widgets. Here’s a step-by-step guide on how to achieve this:
First, ensure you have the necessary libraries:
bash

pip install PyQt5 opencv-python
Now, let’s create a simple PyQt application that displays an image using QLabel:
python
import sys import cv2 from PyQt5.QtWidgets import QApplication, QMainWindow, QLabel, QVBoxLayout, QWidget from PyQt5.QtGui import QPixmap, QImage from PyQt5.QtCore import Qt class ImageDisplayApp(QMainWindow): def __init__(self): super().__init__() self.setWindowTitle("Image Display") self.central_widget = QWidget() self.setCentralWidget(self.central_widget) self.layout = QVBoxLayout() self.central_widget.setLayout(self.layout) self.image_label = QLabel() self.layout.addWidget(self.image_label, alignment=Qt.AlignCenter) # Load and display the image self.display_image("path_to_your_image.jpg") # Replace with your image path def display_image(self, image_path): # Read the image using OpenCV img = cv2.imread(image_path) if img is not None: # Convert BGR image to RGB img = cv2.cvtColor(img, cv2.COLOR_BGR2RGB) # Create QImage from the OpenCV image height, width, channel = img.shape bytes_per_line = 3 * width q_img = QImage(img.data, width, height, bytes_per_line, QImage.Format_RGB888) # Create QPixmap from QImage and set it to the QLabel pixmap = QPixmap.fromImage(q_img) self.image_label.setPixmap(pixmap.scaledToWidth(800)) # Adjust width as needed else: self.image_label.setText("Failed to load image") if __name__ == "__main__": app = QApplication(sys.argv) window = ImageDisplayApp() window.show() sys.exit(app.exec_())Replace “path_to_your_image.jpg” with the path to your image file. This code initializes a PyQt window and displays the specified image using a QLabel widget. It uses OpenCV to read and process the image, converts it into a format suitable for display in a QLabel, and sets it as the pixmap for the QLabel.
Run this code, and it should display the image in a window using PyQt! Adjust the image path and window dimensions as needed for your use case.
Adding a Scrollbar for the Brightness
To add a scrollbar for controlling the brightness of the displayed image, you can integrate a QScrollBar into the PyQt application. Here’s an updated version of the previous code that includes a scrollbar to adjust image brightness:
python
import sys import cv2 from PyQt5.QtWidgets import QApplication, QMainWindow, QLabel, QVBoxLayout, QWidget, QScrollBar from PyQt5.QtGui import QPixmap, QImage from PyQt5.QtCore import Qt class ImageDisplayApp(QMainWindow): def __init__(self): super().__init__() self.setWindowTitle("Image Display") self.central_widget = QWidget() self.setCentralWidget(self.central_widget) self.layout = QVBoxLayout() self.central_widget.setLayout(self.layout) self.image_label = QLabel() self.layout.addWidget(self.image_label, alignment=Qt.AlignCenter) # Scrollbar for adjusting brightness self.brightness_scrollbar = QScrollBar(Qt.Horizontal) self.brightness_scrollbar.setMinimum(0) self.brightness_scrollbar.setMaximum(100) self.brightness_scrollbar.setValue(50) # Set initial brightness self.brightness_scrollbar.valueChanged.connect(self.adjust_brightness) self.layout.addWidget(self.brightness_scrollbar) self.display_image("path_to_your_image.jpg") # Replace with your image path def display_image(self, image_path): img = cv2.imread(image_path) if img is not None: img = cv2.cvtColor(img, cv2.COLOR_BGR2RGB) height, width, channel = img.shape bytes_per_line = 3 * width q_img = QImage(img.data, width, height, bytes_per_line, QImage.Format_RGB888) pixmap = QPixmap.fromImage(q_img) self.image_label.setPixmap(pixmap.scaledToWidth(800)) self.current_image = img.copy() # Save a copy for brightness adjustment else: self.image_label.setText("Failed to load image") def adjust_brightness(self, value): brightness = value / 100.0 adjusted_img = cv2.convertScaleAbs(self.current_image, alpha=brightness, beta=0) adjusted_img = cv2.cvtColor(adjusted_img, cv2.COLOR_BGR2RGB) height, width, channel = adjusted_img.shape bytes_per_line = 3 * width q_img = QImage(adjusted_img.data, width, height, bytes_per_line, QImage.Format_RGB888) pixmap = QPixmap.fromImage(q_img) self.image_label.setPixmap(pixmap.scaledToWidth(800)) if __name__ == "__main__": app = QApplication(sys.argv) window = ImageDisplayApp() window.show() sys.exit(app.exec_())This updated code introduces a horizontal scrollbar (self.brightness_scrollbar) and connects its valueChanged signal to the adjust_brightness method. The adjust_brightness method modifies the image’s brightness based on the scrollbar’s value and updates the displayed image accordingly.
Replace “path_to_your_image.jpg” with the path to your desired image file. Run this code to display an image with a scrollbar allowing you to adjust its brightness. Adjust the setValue function in the scrollbar setup to set your preferred initial brightness level.
Acquiring a Movie: QtThreads
To acquire a movie (a sequence of frames) while maintaining a responsive GUI, you can use Qt threads to perform the video acquisition in the background. Here’s an example of how you can achieve this by integrating threads into the PyQt application:
python
import sys import cv2 from PyQt5.QtWidgets import QApplication, QMainWindow, QLabel, QVBoxLayout, QWidget, QPushButton from PyQt5.QtGui import QPixmap, QImage from PyQt5.QtCore import Qt, QThread, pyqtSignal, QObject class VideoWorker(QObject): finished = pyqtSignal() frame_data = pyqtSignal(QImage) def __init__(self, cam_num): super().__init__() self.cam_num = cam_num self.running = False def start_acquisition(self): self.running = True self.cap = cv2.VideoCapture(self.cam_num) while self.running: ret, frame = self.cap.read() if ret: frame_rgb = cv2.cvtColor(frame, cv2.COLOR_BGR2RGB) height, width, channel = frame_rgb.shape bytes_per_line = 3 * width q_img = QImage(frame_rgb.data, width, height, bytes_per_line, QImage.Format_RGB888) self.frame_data.emit(q_img) self.cap.release() self.finished.emit() def stop_acquisition(self): self.running = False class ImageDisplayApp(QMainWindow): def __init__(self): super().__init__() self.setWindowTitle("Movie Acquisition") self.central_widget = QWidget() self.setCentralWidget(self.central_widget) self.layout = QVBoxLayout() self.central_widget.setLayout(self.layout) self.image_label = QLabel() self.layout.addWidget(self.image_label, alignment=Qt.AlignCenter) self.start_button = QPushButton("Start Movie") self.start_button.clicked.connect(self.start_movie) self.layout.addWidget(self.start_button) self.stop_button = QPushButton("Stop Movie") self.stop_button.clicked.connect(self.stop_movie) self.layout.addWidget(self.stop_button) self.stop_button.setEnabled(False) self.worker = None def start_movie(self): self.start_button.setEnabled(False) self.stop_button.setEnabled(True) self.worker = VideoWorker(0) self.worker_thread = QThread() self.worker.moveToThread(self.worker_thread) self.worker.finished.connect(self.worker_thread.quit) self.worker.finished.connect(self.worker.deleteLater) self.worker.frame_data.connect(self.display_frame) self.worker_thread.started.connect(self.worker.start_acquisition) self.worker_thread.start() def stop_movie(self): if self.worker: self.worker.stop_acquisition() def display_frame(self, image): pixmap = QPixmap.fromImage(image) self.image_label.setPixmap(pixmap.scaledToWidth(800)) def closeEvent(self, event): if self.worker: self.worker.stop_acquisition() super().closeEvent(event) if __name__ == "__main__": app = QApplication(sys.argv) window = ImageDisplayApp() window.show() sys.exit(app.exec_())This code demonstrates a PyQt application with two buttons, “Start Movie” and “Stop Movie”. The “Start Movie” button initializes the video acquisition in a separate thread (VideoWorker). Frames are continuously emitted via a signal (frame_data) and displayed in the GUI. The “Stop Movie” button terminates the video acquisition thread.
Replace 0 in self.worker = VideoWorker(0) with your camera index or the video file path.
This approach allows the video acquisition process to run independently in the background while keeping the GUI responsive. When the user clicks “Stop Movie,” it triggers the thread to stop the acquisition gracefully. The closeEvent ensures that the acquisition stops when the application is closed. Adjustments can be made to handle error cases or customize the interface further based on your requirements.
Extra Steps that You Can Try
Adding functionalities like dynamically setting the number of frames for movie acquisition, enabling continuous movie recording, and implementing options to save movies or images can significantly enhance the application’s usability.
Here’s an example of how you can integrate these features into the existing code:
Adding QLineEdit for Frame Count
To allow users to specify the number of frames for movie acquisition:
python
# Inside ImageDisplayApp class __init__ method self.frame_count_input = QLineEdit() self.layout.addWidget(self.frame_count_input) self.start_button = QPushButton("Start Movie") self.start_button.clicked.connect(self.start_movie) self.layout.addWidget(self.start_button) # Inside start_movie method frame_count = int(self.frame_count_input.text()) if self.frame_count_input.text().isdigit() else 100 self.worker = VideoWorker(0, frame_count) # Inside VideoWorker class __init__ method def __init__(self, cam_num, frame_count): super().__init__() self.cam_num = cam_num self.running = False self.frame_count = frame_countContinuous Movie Recording
To enable continuous movie recording until manually stopped:
python
# Inside start_movie method frame_count = int(self.frame_count_input.text()) if self.frame_count_input.text().isdigit() else None self.worker = VideoWorker(0, frame_count) # Inside VideoWorker class start_acquisition method while self.running and (self.frame_count is None or self.frame_count > 0): ret, frame = self.cap.read() if ret: # ... rest of the acquisition code # Inside stop_movie method if self.worker: self.worker.stop_acquisition()Adding Button to Save Movie or Image
To implement saving functionality using HDF5 files or other formats:
python
# Inside ImageDisplayApp class __init__ method self.save_button = QPushButton("Save Movie/Frame") self.save_button.clicked.connect(self.save_movie_or_frame) self.layout.addWidget(self.save_button) # Inside ImageDisplayApp class save_movie_or_frame method def save_movie_or_frame(self): if self.worker: movie = self.worker.get_movie() # Implement a method to retrieve movie data from the worker # Implement code to save the movie using HDF5 or preferred format else: frame = self.current_frame # Replace with method to get the current displayed frame # Implement code to save the frame as an imagePlease note, these additions will require some modification and implementation of functions within the VideoWorker class to handle movie acquisition, retrieving movie data, and possibly saving it using HDF5 or other formats. Adjust the code to fit your specific use case and requirements.
Conclusion
By the end of this tutorial, you’ll have a solid understanding of GUI development principles and the practical skills to create your own interfaces. Whether it’s for desktop applications, mobile apps, or web development, mastering GUI creation will open doors to diverse opportunities in software development.
This tutorial aims to be a comprehensive resource for beginners, covering every aspect of GUI development. From the fundamental concepts to the intricate details of customization and deployment, it will empower readers to create engaging and functional interfaces. Whether it’s a desktop application, a mobile app, or a web-based system, the skills learned here will be invaluable for anyone stepping into GUI development.